As I spend a lot of time in the car I wanted it to look for comfortable and appealing.
This update is a combined range of small mods that I have done over several months that overall has tidied up the interior of the A3.
There are quite honestly loads of mods that can be done in the interior of the car, and even with this fairly large update I can tell you there are still loads more that I want to do to finish off my interior!
So where do I start?
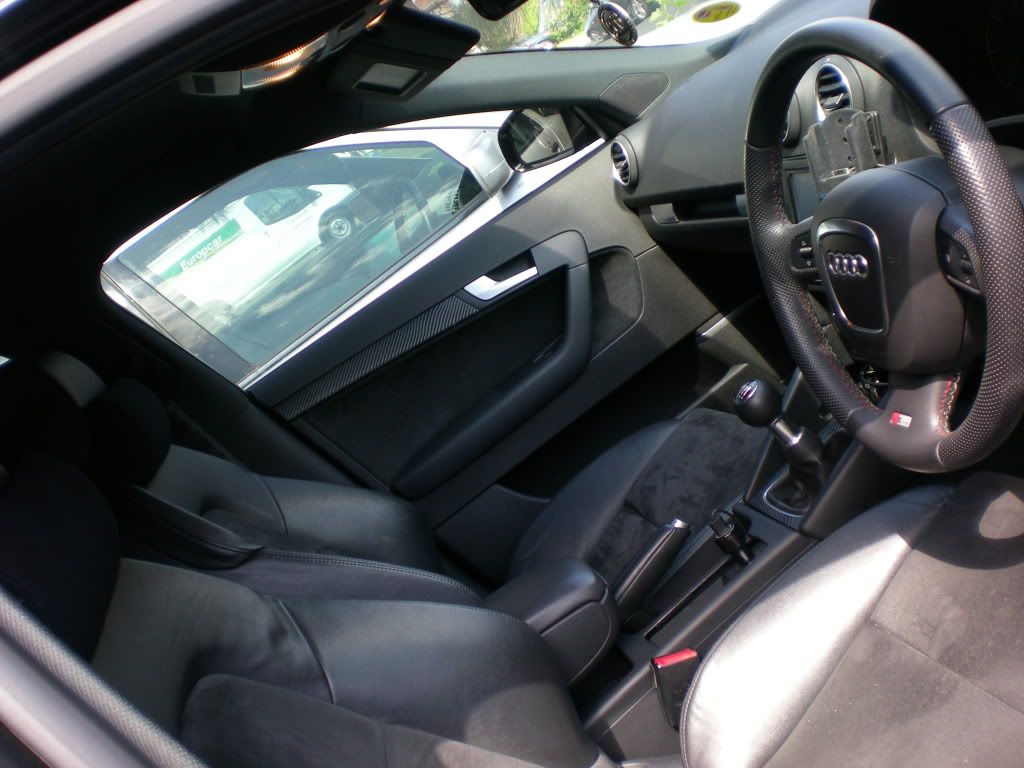
S3 Pedals
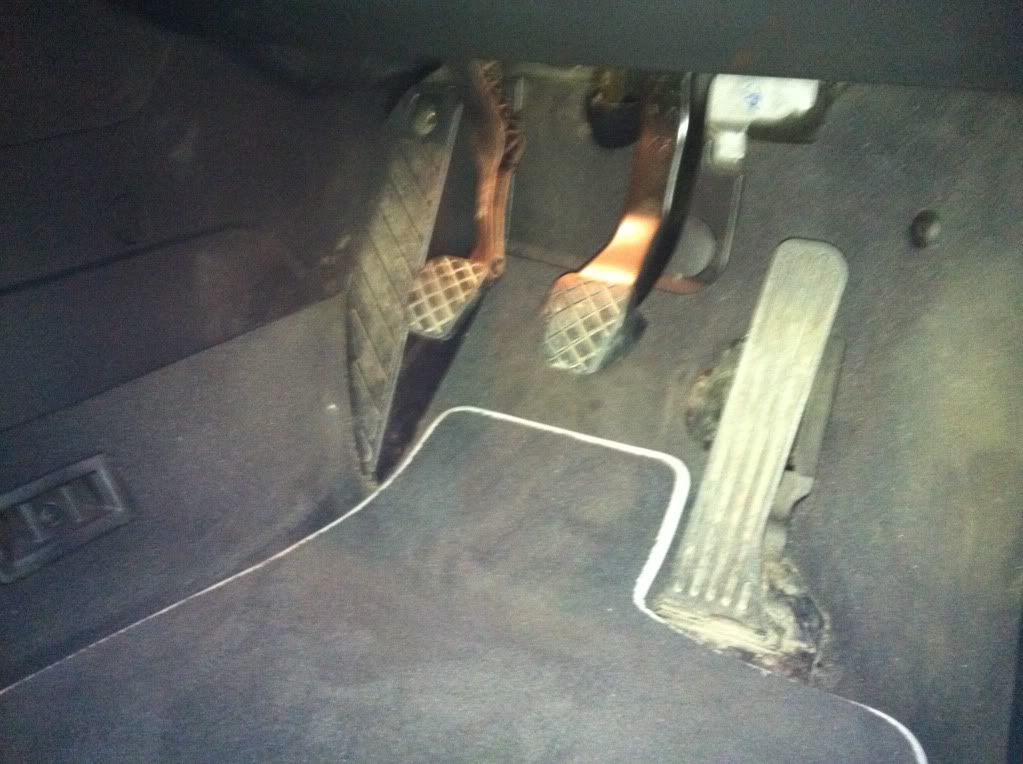
Well one thing I hated was the boring and dirty look of the standard pedals in the A3.
This update is a combined range of small mods that I have done over several months that overall has tidied up the interior of the A3.
There are quite honestly loads of mods that can be done in the interior of the car, and even with this fairly large update I can tell you there are still loads more that I want to do to finish off my interior!
So where do I start?
S3 Pedals
Well one thing I hated was the boring and dirty look of the standard pedals in the A3.
I got some nice original A3 carpets in which made it look slightly better.
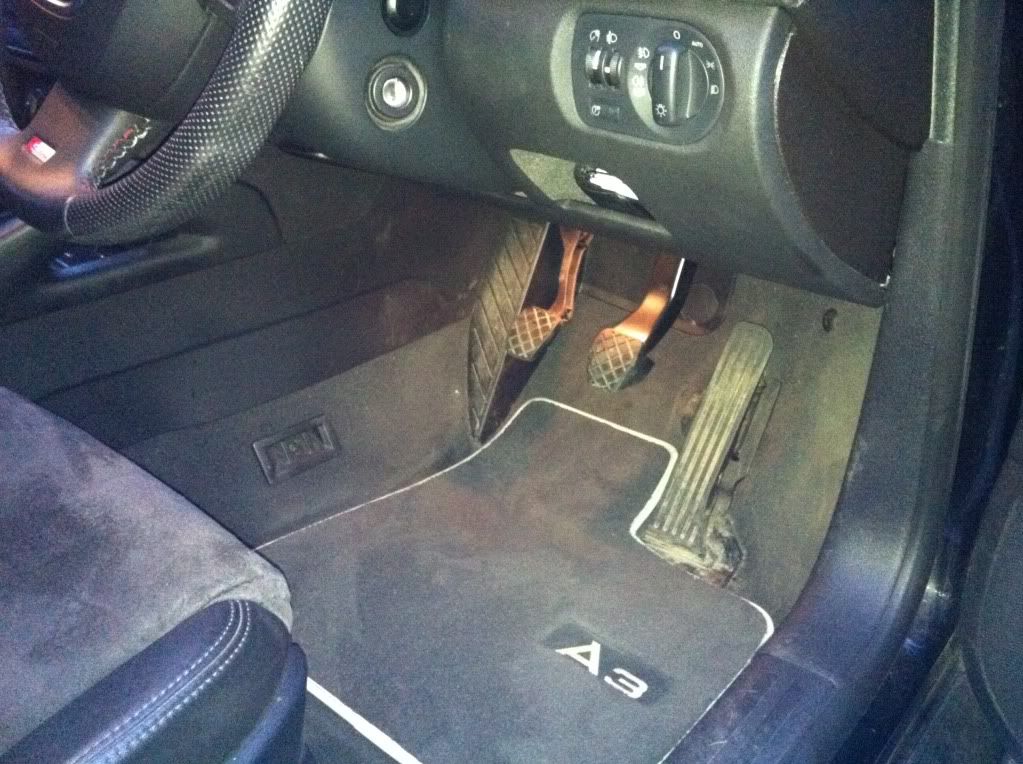
But I liked the look of the chrome pedals for the Audi S3 so I started fishing around on eBay and managed to find some a fairly good price. The install of the pedals are not hard at all, just pull off the 2 smaller rubber pedal covers and replace with the chrome ones. The accelerator pedal was more tricky as it's held down with some very small clips underneath the pedal and a bolt to the left of it. The clips take some patience to take off but about 10 minutes later I had sore fingers and the old pedal free, then I just fitted the new pedal in place.
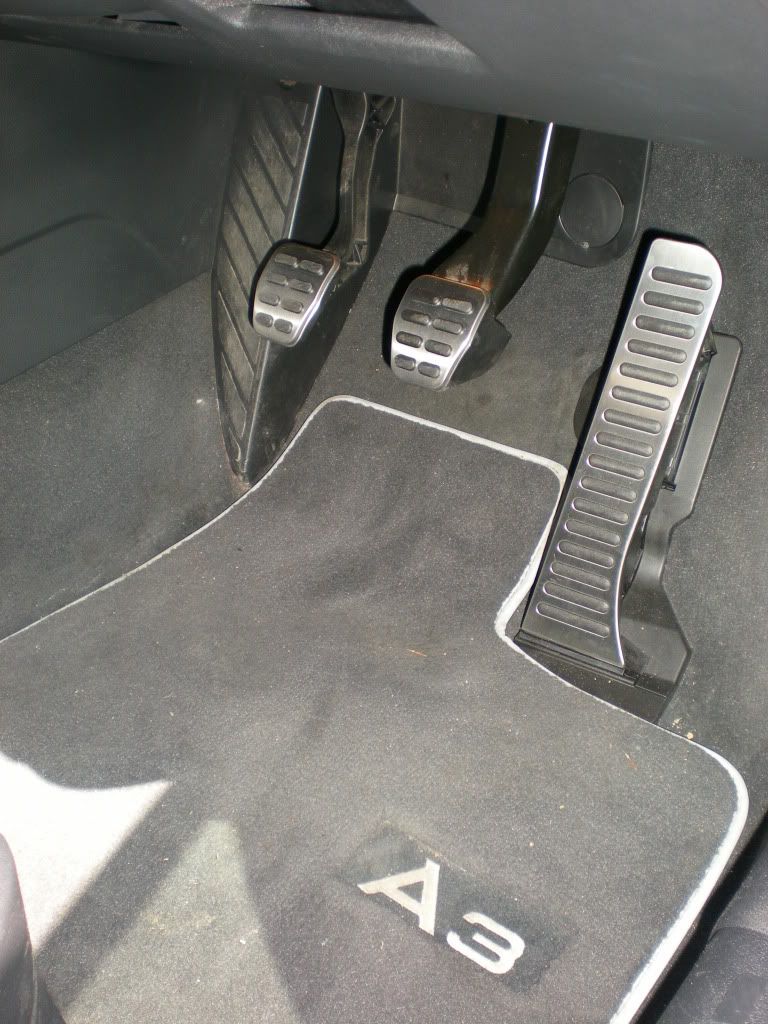
I still didn't like the worn out plastic look on the dead pedal so I found a metal cover that bolted onto the original plastic... unfortunately I didn't get a picture of when I installed it but you can see it here:
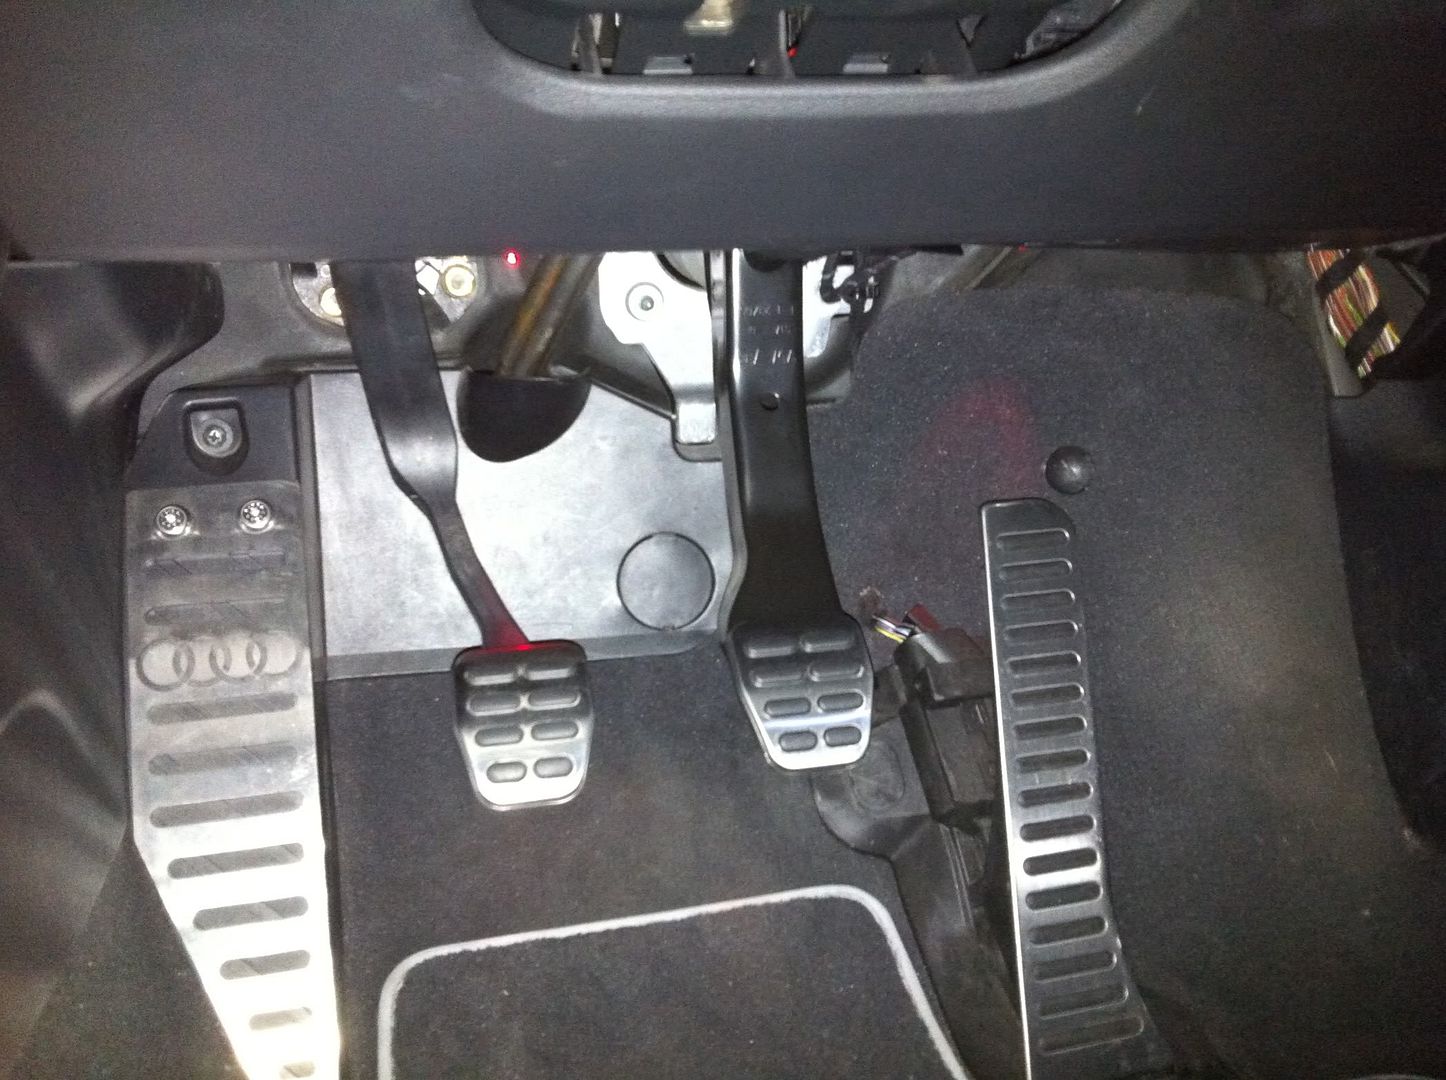 |
| Chrome pedal with Audi Dead pedal |
Ignore the red glow, I'll explain that in part 2.
-----------------------------------------------------------------------
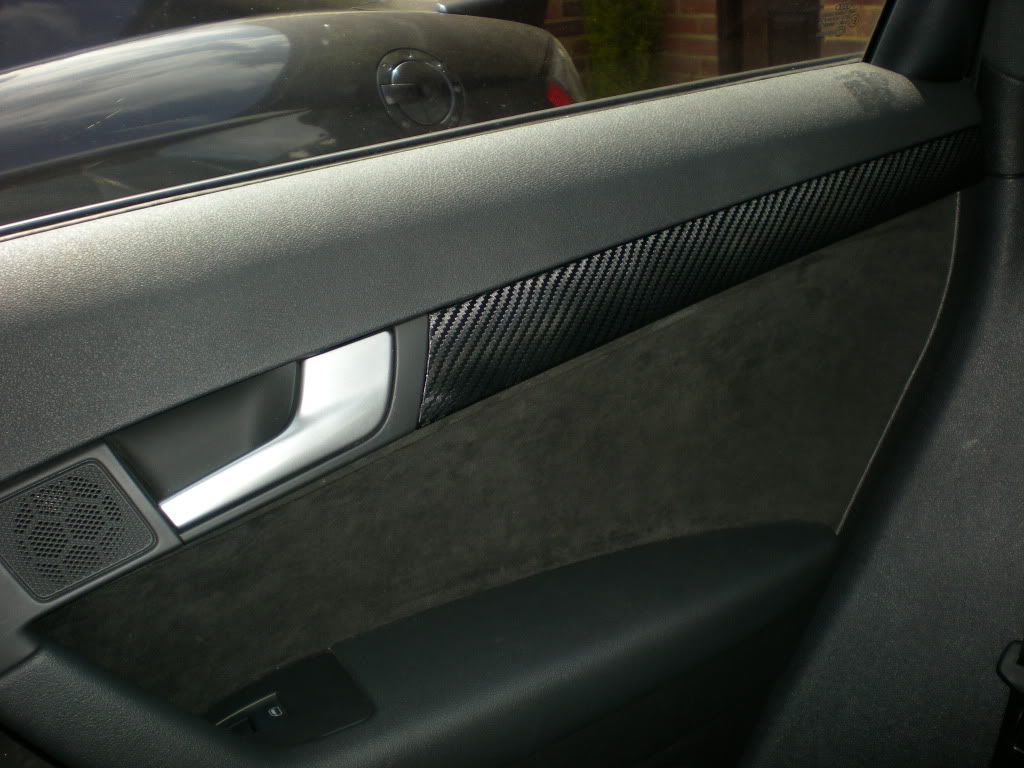
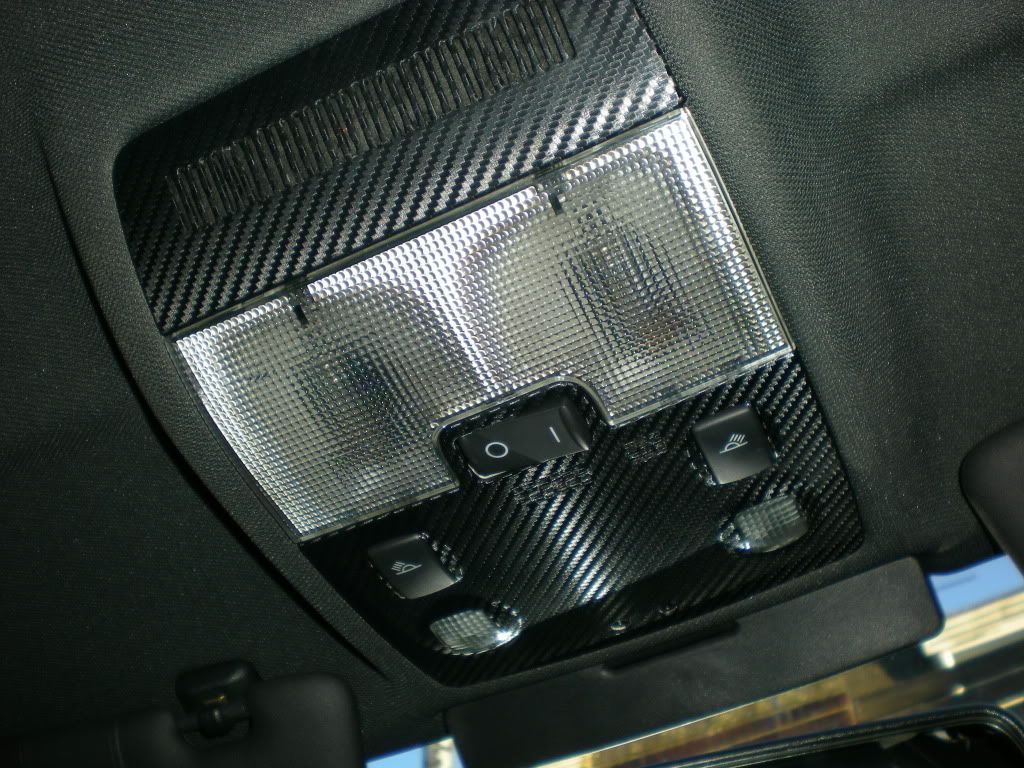
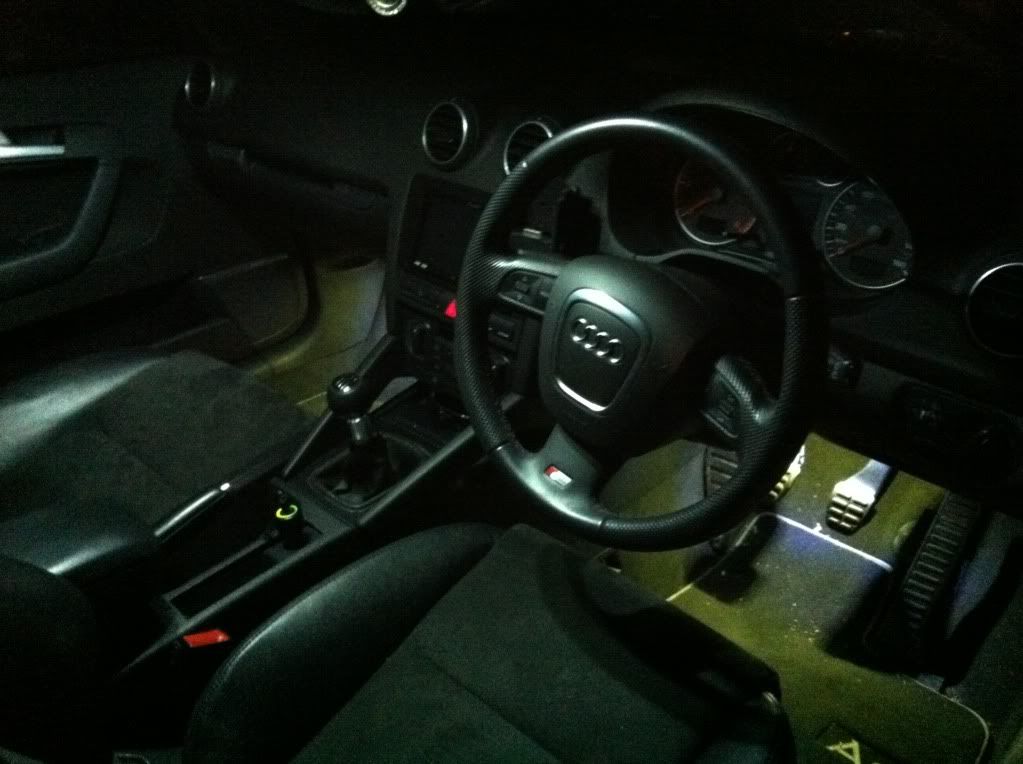
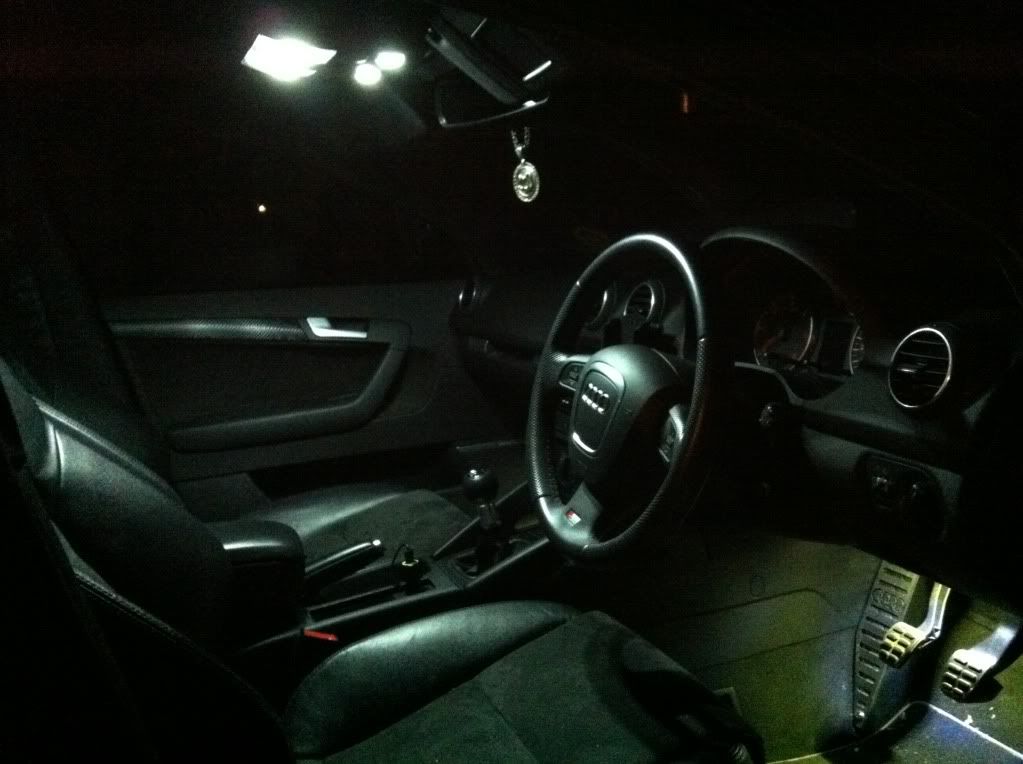
Carbon Fever
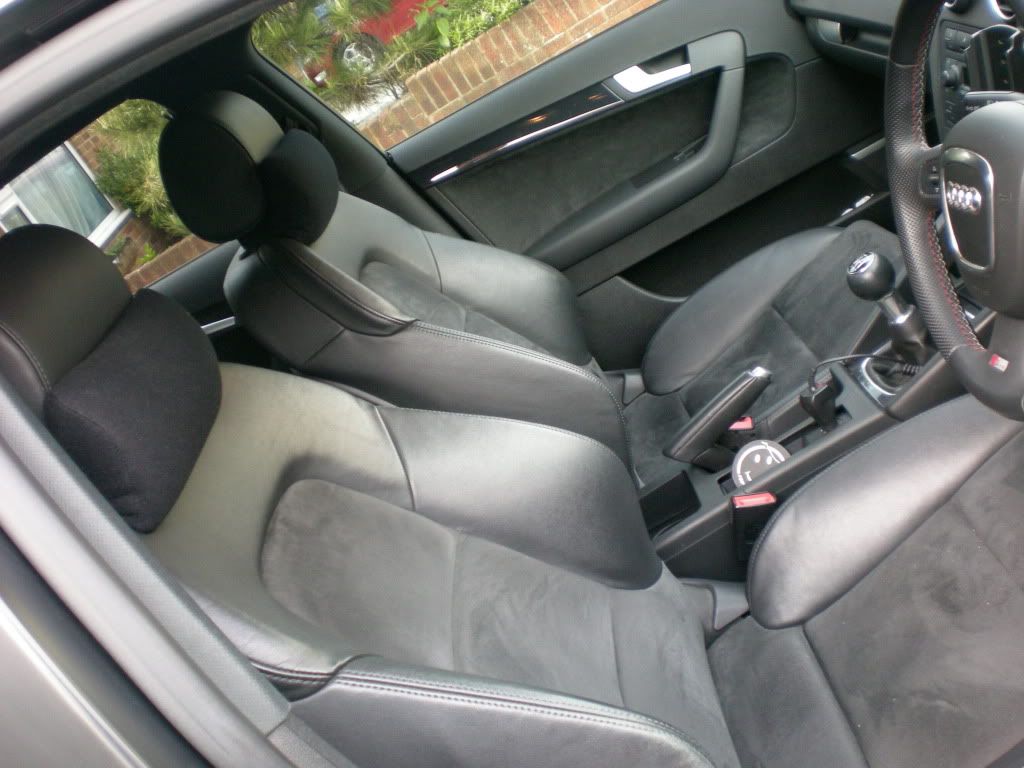
Another thing I didn't like was the boring glossy black trims in the car. Over time with the previous owner the trims in the car had gotten scratched and ruined.
You can see the part I mean around the gear stick and by the door handle

I quite liked the look of Carbon fibre that you get on some of the higher range cars so I found some Carbon wrap on eBay for only £10 and I started getting to work.
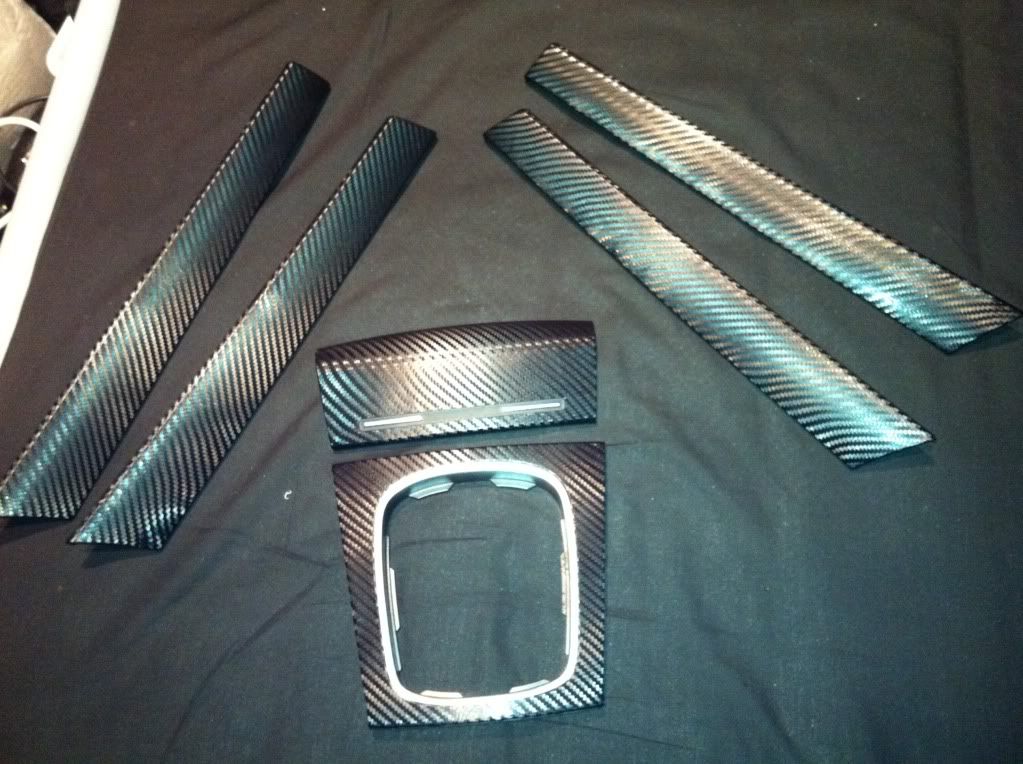
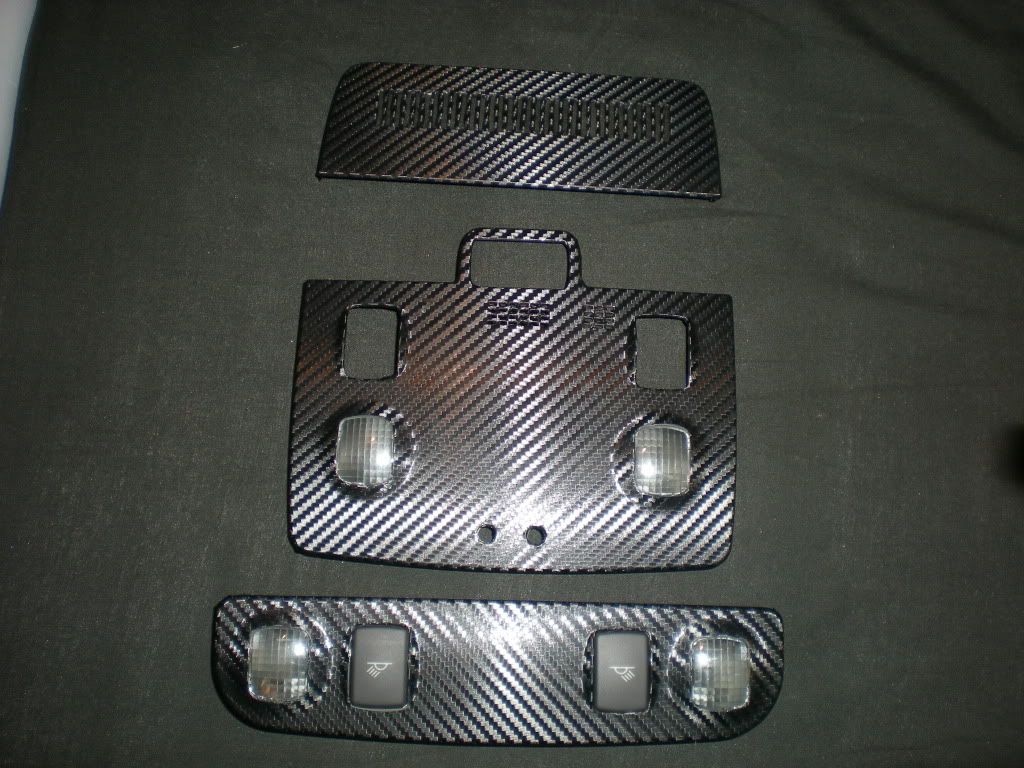
After I did the door trims and the gear surround I got a little carried away with it so I started looking for other bits in the car to wrap and I found these:
 | |
| Plastic trim around the roof lights |
After 2 hours I ended up very sore burnt fingers and this:
I knew at this point I should stop but I couldn't help myself so I ended up wrapping my laptop too :P

Once all those bits were done I fitted them back onto the car:
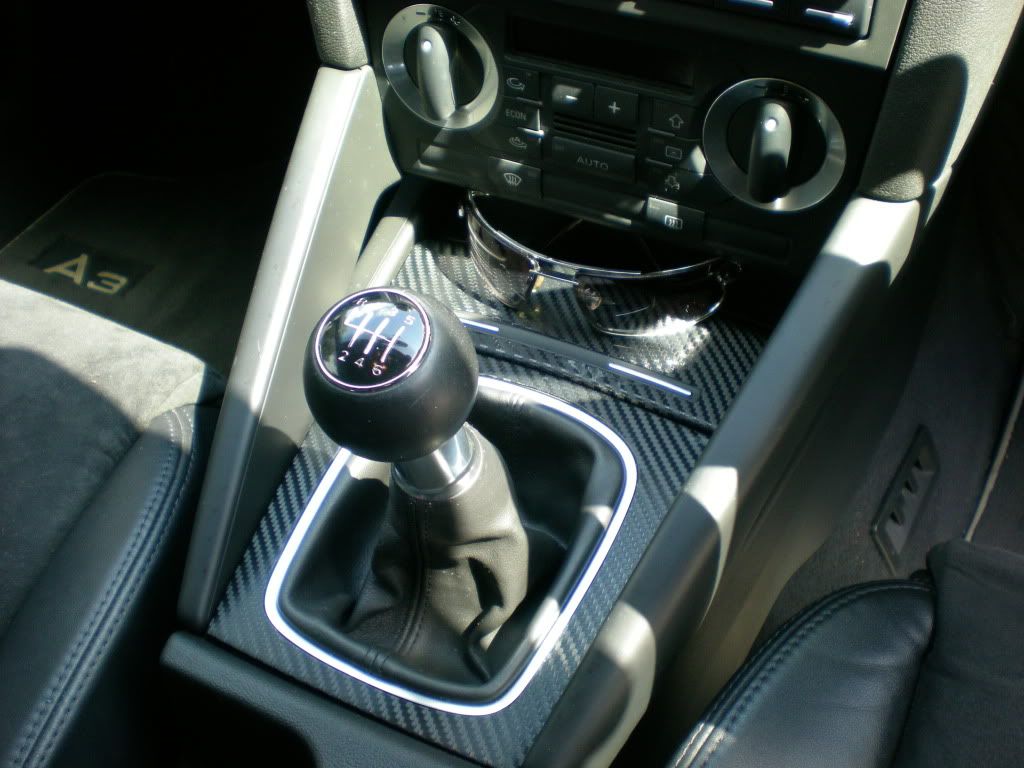
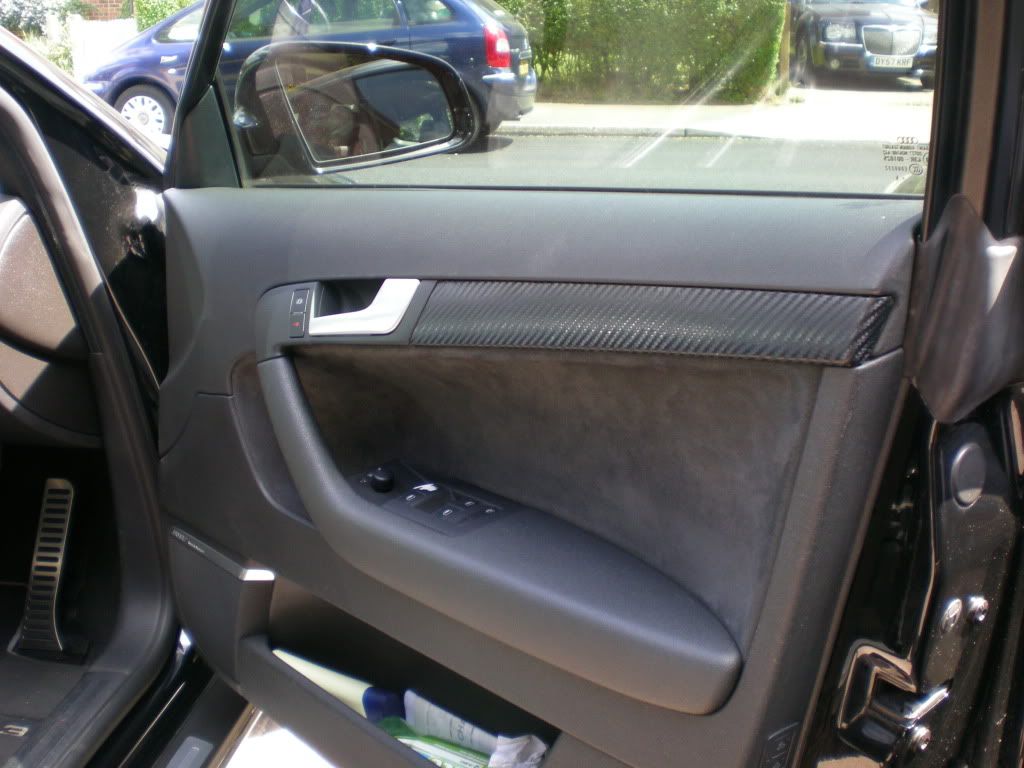
I am quite pleased with how it turned out, though it took a lot of patience wrapping those pieces and getting it perfect without any creases or bubbles!
-----------------------------------------------------------------------
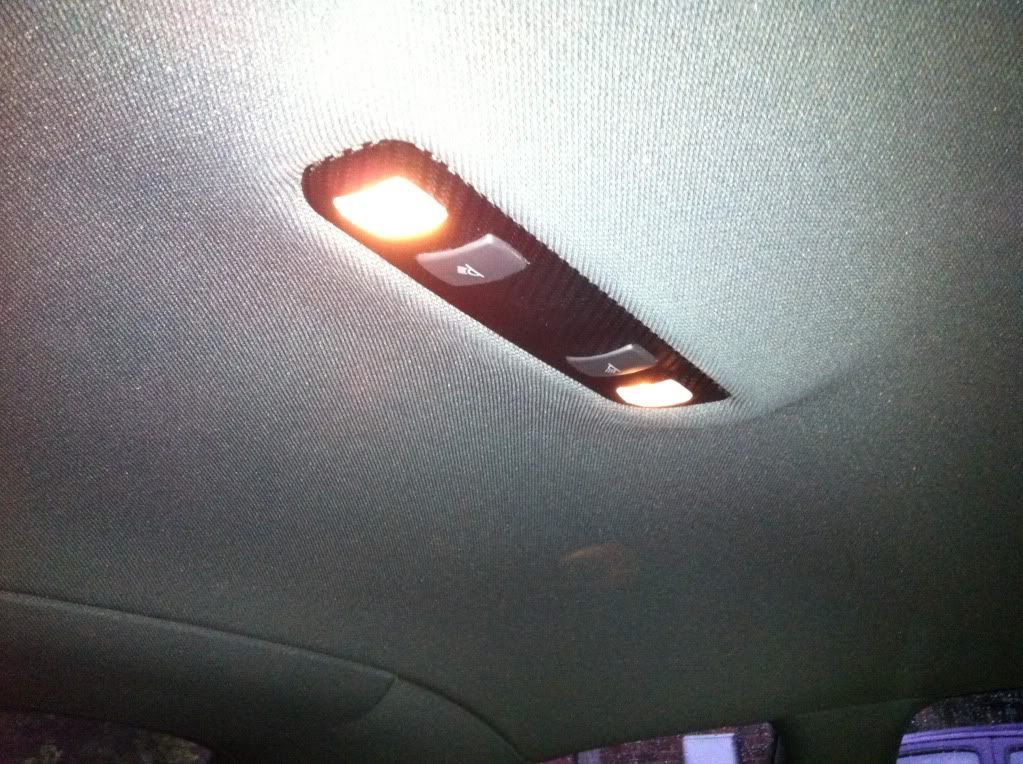
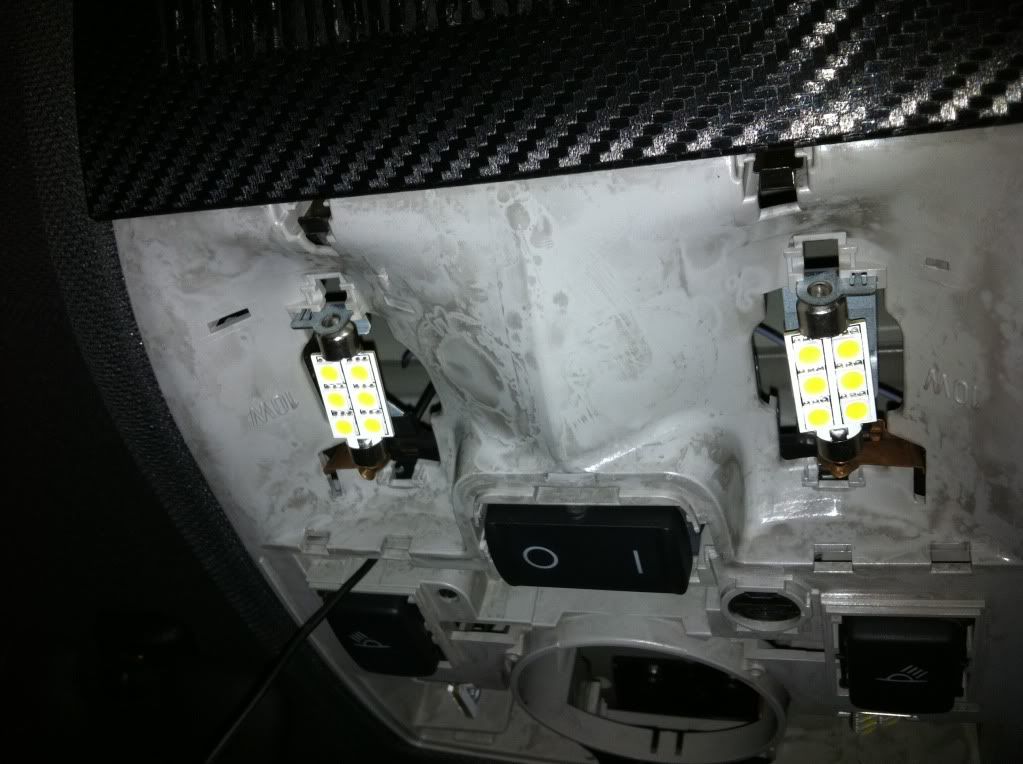
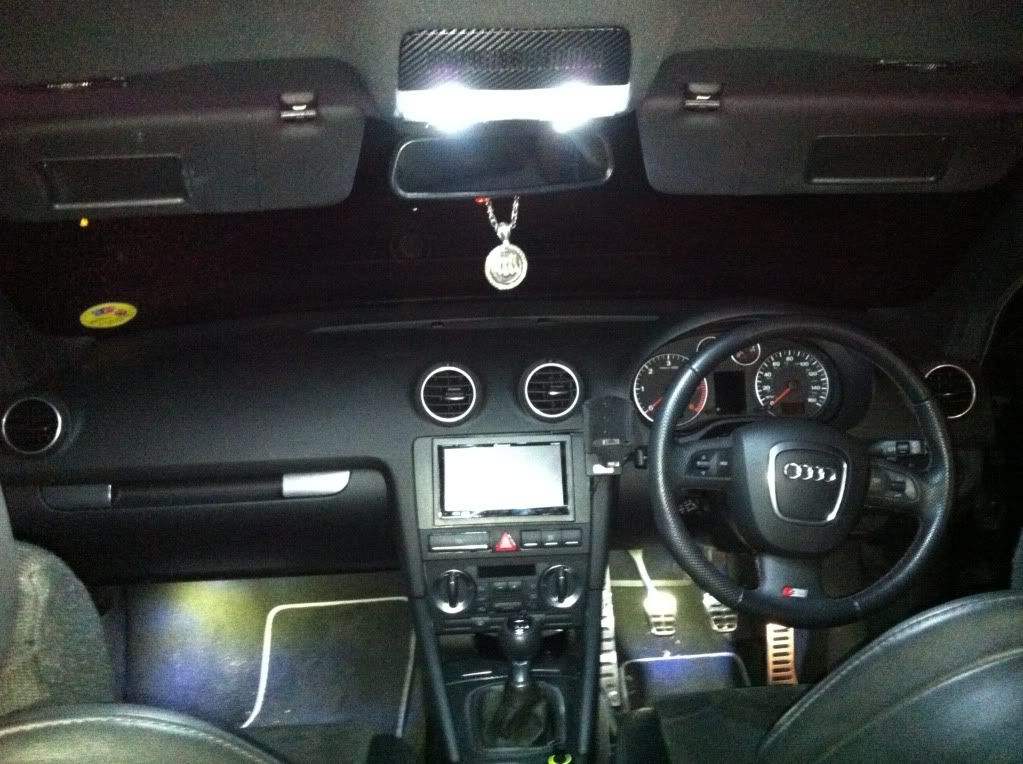
LED Interior
The next thing that bugged me was the ugly yellow glow of all the interior lights. I was lucky to have an A3 that was spec'd with the 'Interior light pack' which basically means I have a light bulb in almost every part of the car. I had been wanting to upgrade those lights for months but I couldn't find a set of bulbs that would do it for me. Again the Audi would throw up DIS errors if I tried to fit LEDs without resistors but the areas in where the bulbs would be fitted are so small that in some cases an extra resistor would mean a very fiddly install and not to mention the issue with heat output.
I was contacted on the Audi-Sport Forum while there were some posts flying around about LED interior bulbs by a new user with a new product... He said that he has a new range of LED bulbs specially designed for the Audi's and that these bulbs will not throw an error on the DIS... And that I can specify the brightness of the bulbs and order the bulbs tailored to how many bulbs I wanted to replace, the only condition was that I would need to wait a month while he went through final tests on the bulbs to make sure they were perfect.
So I waited patiently and I made a list with this new supplier of all the bulbs I needed. At the same time I asked about a custom install that I wanted to do with some LEDs so I also ordered a few extra bits.
 |
| Standard rear roof light |
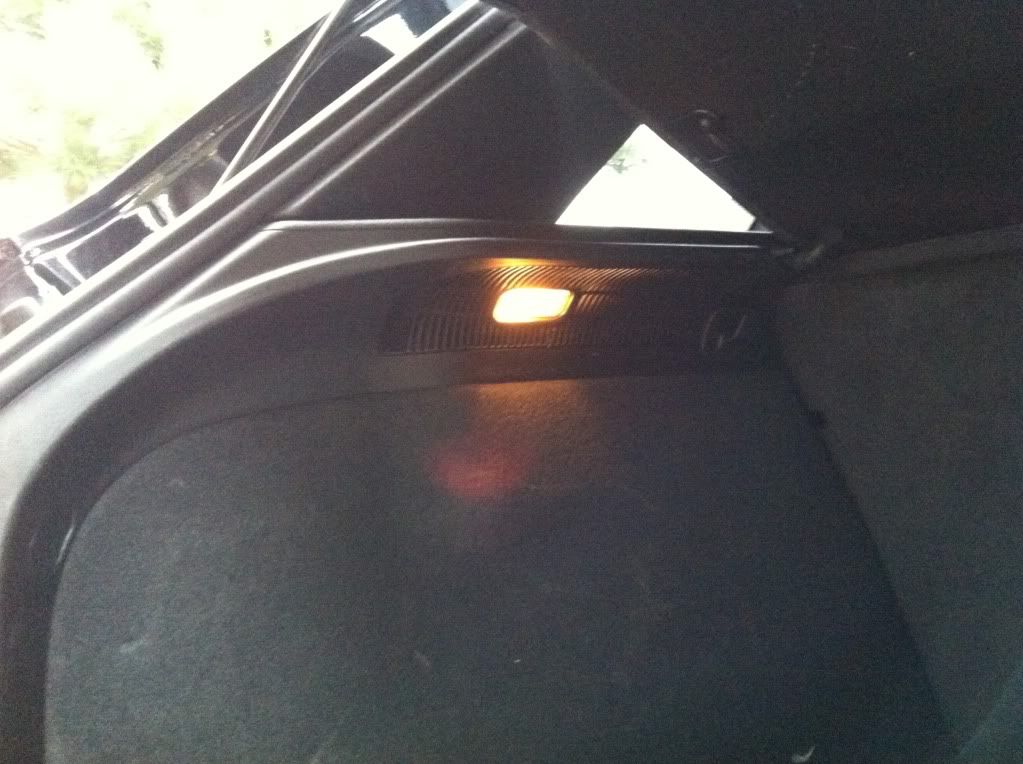 |
| Standard Boot light |
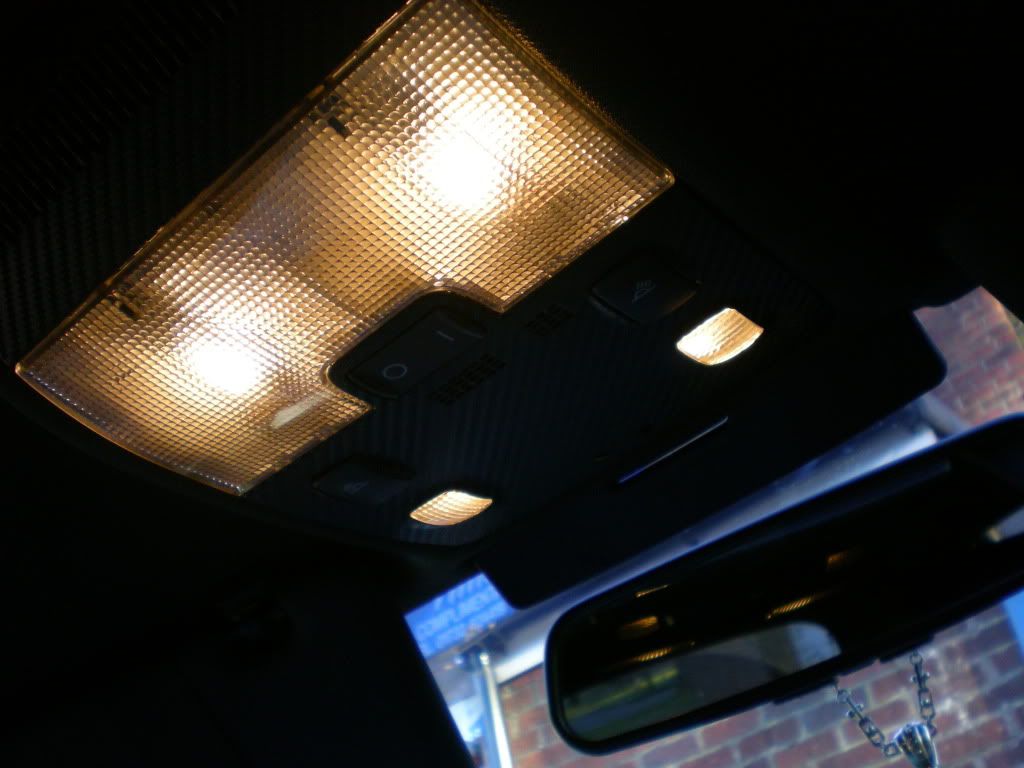 |
| Standard Dome lights |
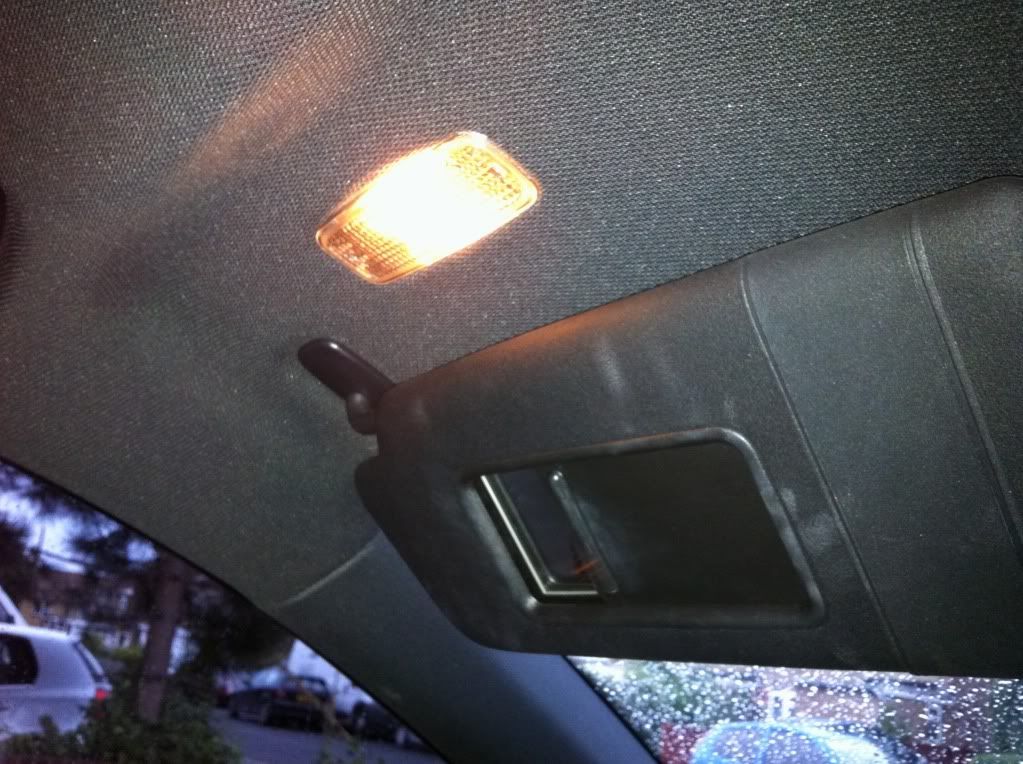 |
| Standard vanity mirror light |
After agreeing on all the bits I would need I placed the final order and waited. 2 days later I received a nice little package of bulbs and got straight on with the installs. Let there be light!!
 |
| LED Dome lights |
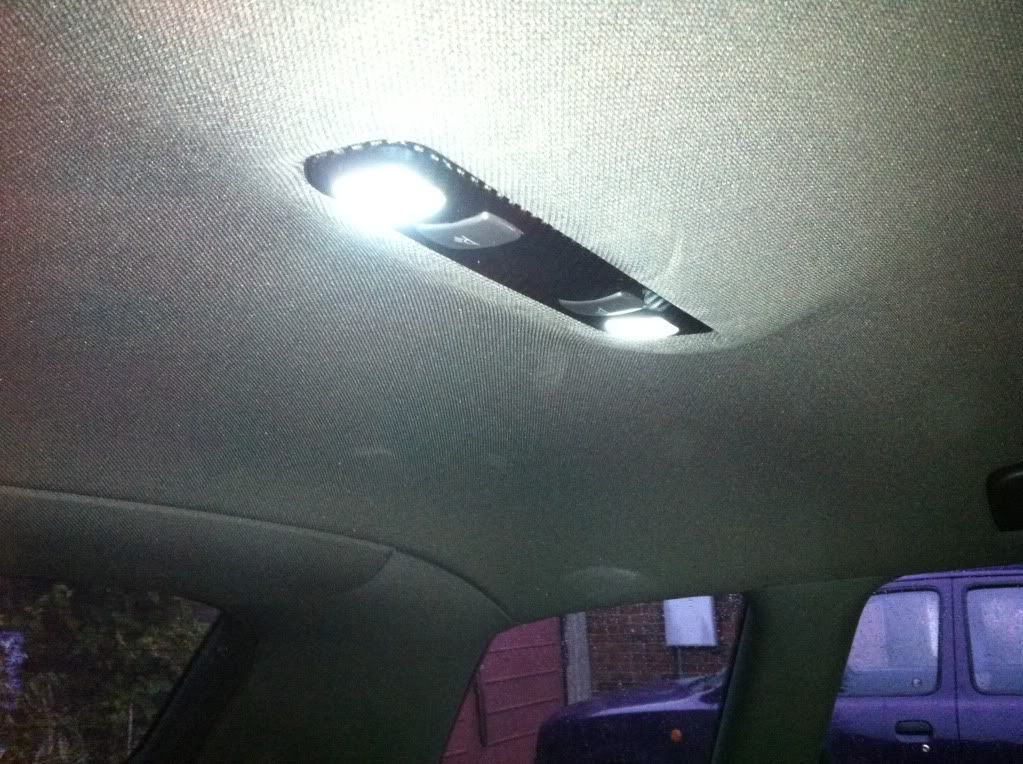 |
| LED Roof lights |
 |
| LED Vanity mirror lights |
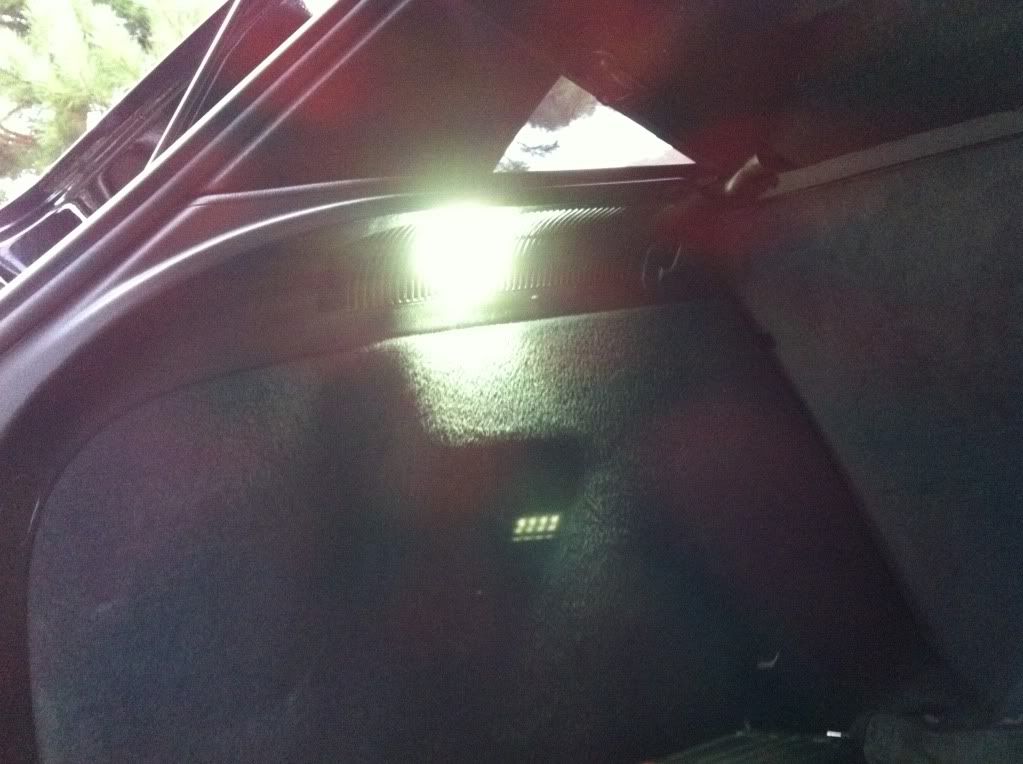 |
| LED Boot light |
 |
| LED Footwell lights |
 |
| Nice and bright |
 |
| LED Puddle lights |
I was so chuffed with this install... makes such a difference to the car at night! really makes it feel like I am sitting in a Premium brand car :)
There was also the custom install that I wanted to do, something that no other A3 had and although in the end it wasn't much I still like having this extra touch.
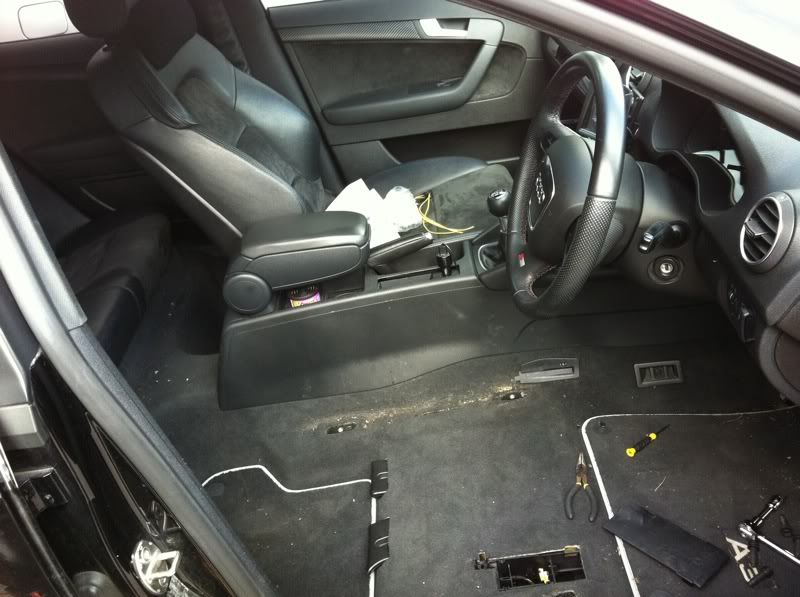
I wanted to install rear footwell lights in the A3. The seats already had a cut out for the light holder so it was a case of getting the bits and rewiring the car to get the light working. Now I wanted it to look as OEM as I could so the wiring could not be visible at all! I decided the best way to do this would be to run the wiring from the front footwell lights, under the carpets and into the seat harness where the front seat airbag looms were and into the connector for the rear footwell lights. To make it perfectly tidy and OEM it would take a fair bit of work and what with my mild case of OCD I wanted to make sure it was a nice clean job.
So I made myself up a loom and got access to the front footwell loom. I spliced and soldered the custom loom onto the original front footwell loom and then ran it under the carpet. The front seats were in the way so it needed to come out!
There was also the custom install that I wanted to do, something that no other A3 had and although in the end it wasn't much I still like having this extra touch.
I wanted to install rear footwell lights in the A3. The seats already had a cut out for the light holder so it was a case of getting the bits and rewiring the car to get the light working. Now I wanted it to look as OEM as I could so the wiring could not be visible at all! I decided the best way to do this would be to run the wiring from the front footwell lights, under the carpets and into the seat harness where the front seat airbag looms were and into the connector for the rear footwell lights. To make it perfectly tidy and OEM it would take a fair bit of work and what with my mild case of OCD I wanted to make sure it was a nice clean job.
So I made myself up a loom and got access to the front footwell loom. I spliced and soldered the custom loom onto the original front footwell loom and then ran it under the carpet. The front seats were in the way so it needed to come out!
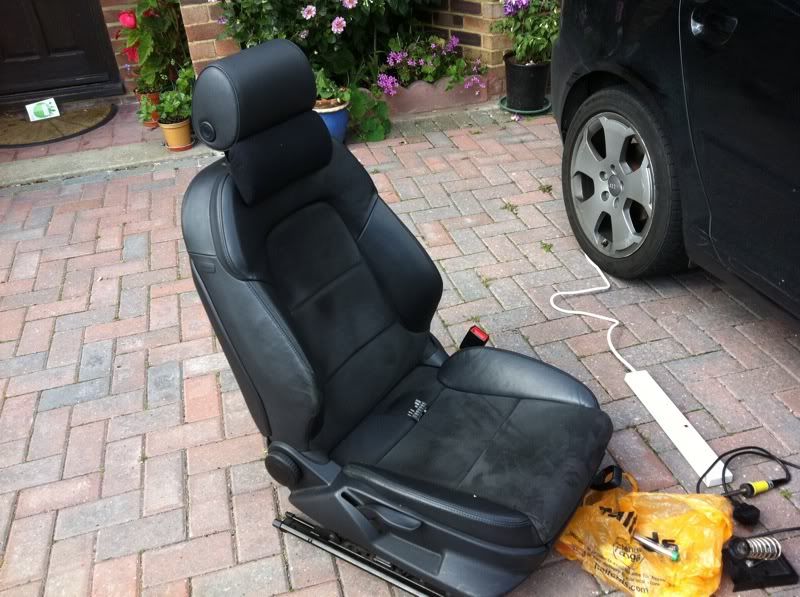 |
| Front seat out of the car :) |
 | ||
| Now that the seat is out I can work on the carpet, and clean up all that filth in the corner of the seat runners. |
Now as I was aiming for OEM I figured that the loom couldn't go from the front footwell light directly to the rear light, since the seat might need to come out and the light would need to be disconnected. So I measured the loom to the opening under the front seat (the hole you can see in the carpet in the above photo) and cut the loom in 2 and put some bullet connectors on the loom. I then took the other half of the loom and wired it directly under the front seat to the bulb holder so that now the loom would be hidden under the seat and moving the seat forward or backwards would not pull the wire in any way. I put another set of bullet connectors to the loom underneath the front seat and then re-fitted the seat back to its place. Once it was fitted I reconnected the airbag loom and the new custom rear footwell loom in place and tested it all out... no errors at all and perfect lit up footwells! I repeated the process for the passenger side and here is what the completed custom install looks like:
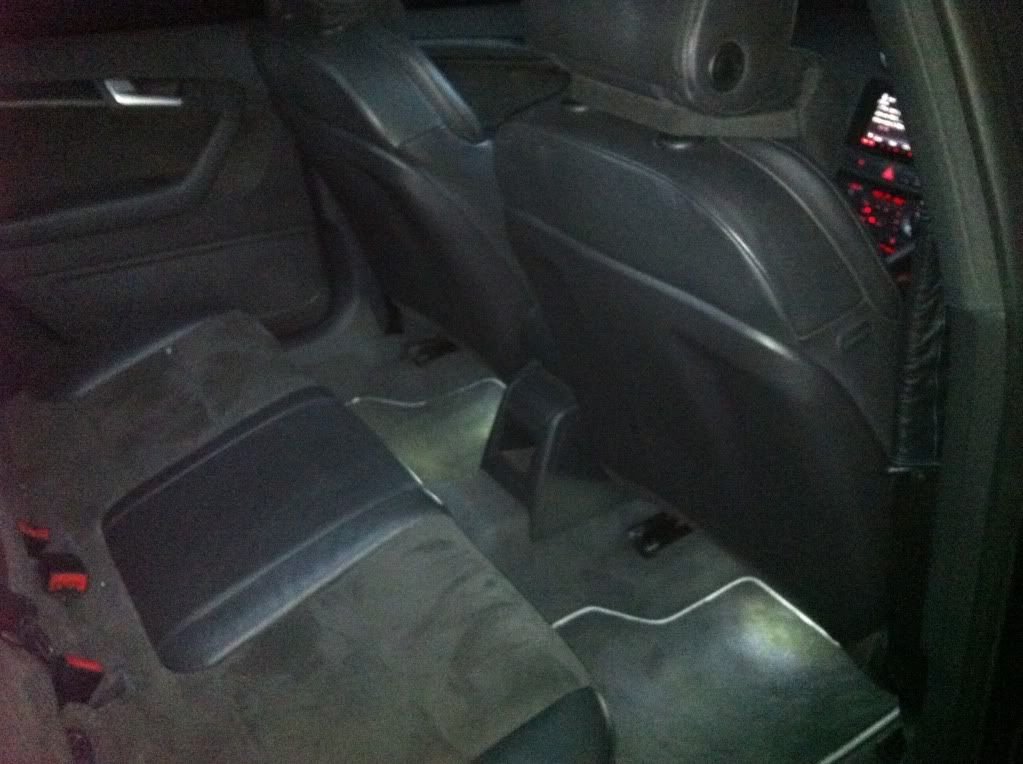 |
| Rear footwells installed |
That's the end of part 1, more of the interior make over on part 2...